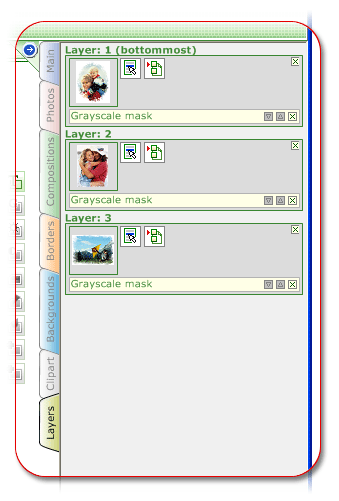
Layers
Use Layers tab to access
frames of your current project. This tab presents frames as layers. Every layer
contains information on the photo located in this frame and effects applied to
it.
Besides, now you can block any frame. If you do, this frame won't be available
for moving or editing.
You can also change the order in which effects are applied to any frame.
To block a frame so that it could be neither moved nor edited, press  button and select Lock layer command.
  label will appear on the frame.
To unblock the frame, press label.
label will appear on the frame.
To unblock the frame, press label.
To add an effect to the frame, press  button. In the dialog box that appears, select
the effect you need, then select one of available presets and press 'Add'
button.
button. In the dialog box that appears, select
the effect you need, then select one of available presets and press 'Add'
button.
To edit any effect, press  line with effect name
on it. To remove an effect, press
line with effect name
on it. To remove an effect, press  button located in the top right corner of
the line.
button located in the top right corner of
the line.
To remove a frame from the tab, press button located in the top right corner of
the frame.