PhotoMix Home PageNewsDownloadOrderSupportTutorialsAddinsTemplatesArticles
Download PhotoMixPhotoMix - Scrapbooking and Collage Software

How to use any clipart with PhotoMix

There is much graphics available nowadays, both free and commercial. And for sure you have many kits that you'd like to use with PhotoMix. Follow this tutorial to learn how to use any graphic files with PhotoMix.

1. Supported formats

You can take graphics in any popular graphics format - *.bmp, *.gif, *.jpg, *.png, *.wmf, *emf, and numerous others. If *.gif or *.png files contain transparent areas the transparency will be preserved in PhotoMix.

2. Where to copy files

  • Go to folder C:\Program Files\PhotoMix\Primitives\
  • Create a new folder and give it a name
  • Copy your graphics files to that folder

3. Change extension

3.1 First of all make sure that file extensions are shown

  • Open Windows Explorer
  • Go to Tools -> Folder Options
  • Open View tab
  • Make sure that checkbox "Hide extensions for known file types"  is not checked

3.2 Rename files

  • Open the folder with your files
  • Right click on a file
  • Select Rename
  • Delete extension (three letters on the end of filename after dot)
  • Type pri

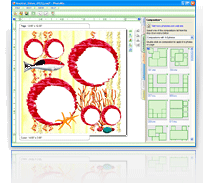
4. Find your graphics in PhotoMix

  • Launch PhotoMix
  • Go to Clipart tab
  • Select your graphics from drop-down menu

If you have questions on this feature, please contact PhotoMix Support.


fCoder Solutions © 2016