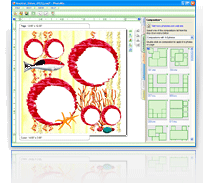
- Select an image in the project.
- On the View menu, click Borders to go to Borders tab.
- Select a border pack from the dropdown list. The name of the pack corresponds to the name of the installed addin.
- Drag the border to the image:
- Point at the border you like with your mouse cursor and press left mouse button,
- Move the cursor to the image in the project and release left mouse button.
How to remove a border
- On the View menu, click Layers to go to Layers tab.
- In Layers tab, find the image you applied the border to.
- Press ... to the right of Grayscale mask line or Colored mask line located below the image.
|